Physical Address
304 North Cardinal St.
Dorchester Center, MA 02124
Physical Address
304 North Cardinal St.
Dorchester Center, MA 02124
This tutorial will guide you through the fun and rewarding process of growing food in small containers. From potatoes, garlic and onions, to carrots and even leafy greens. Learn the grow cycles, the soil requirements and the different setups for indoor and outdoor planting.
Growing your own food in small containers is healthy, fun, low-tech, low-cost way to garden at home. With a few old buckets, jars, or recycled half barrels, you can raise potatoes, garlic, onions, and other easy crops right on your patio or even indoors under lights. This complete tutorial will walk you through each step – from choosing containers and mixing soil to planting, caring, and harvesting – all while keeping things sustainable by reusing materials.
Growing food in small containers is empowering. You’ll reduce waste, learn new skills, and literally enjoy the fruits (and tubers and leaves) of your labor. Whether you have a sprawling backyard or a tiny apartment, we hope this warm tutorial inspires you to get your hands dirty and start planting. Happy gardening, and may your harvests be bountiful year-round!
Note: While this tutorial is laser focused on growing food in small containers, you can also learn about other planting techniques such as a hydroponics and aeroponics, as well as information regarding cycles, indoor plant care and problem solving visiting The Ultimate Edible Indoor Garden Guide.
Growing vegetables in small or specially recycled containers has so many benefits. It’s budget-friendly and eco-conscious – you’re repurposing items like plastic drums, jars, old tubs, or buckets that might otherwise be trash. It’s also space-saving; even if you don’t have a yard, you can grow food on a balcony, doorstep, or sunny windowsill. Container gardening keeps things manageable for beginners (and this cannot be stressed enough, it’s much easier!): you have small defined areas that are easier to weed, water, and protect from pests. Plus, you can move containers around to catch the best light or shelter plants from bad weather. In short, recycled container gardening lets anyone enjoy the rewards of homegrown produce, no matter how little space or experience you have.
One huge appeal of this method is using what you have on hand. Look around your home for potential planters. Half barrels or drums cut in half make excellent large planters (great for potatoes or multiple onions). Plastic buckets (5-gallon size or bigger) are superb for deep-rooted crops – just drill a few drainage holes in the bottom. Even old trash cans, storage totes, or styrofoam ice boxes can be turned into planters with some drainage holes added. For smaller crops or herb snippets, you can use large jars, yogurt tubs, coffee cans, or soda bottles with the tops cut off. Terracotta pots, wooden crates, or even old tires stacked up can work as well – this is very choose your own adventure! Just make sure that whatever container you use is food-safe (if it held chemicals before, avoid it), holds soil, and won’t fall apart when wet.
Before filling your container, ensure it has good drainage. Drill or punch at least a few holes in the bottom (or sides near the bottom) of solid containers. If using jars or other containers that can’t be punctured (like glass), plan to water very sparingly or use them only for plants that can grow in water (we’ll cover that later). It also helps to put a layer of coarse gravel, pebbles, or broken pottery at the bottom of big containers to prevent waterlogging. Place containers on bricks or blocks if they’ll be outdoors, so water can drain freely and roots don’t get waterlogged.
Now let’s mix up some soil. The beauty of container gardening is you control the soil quality. A basic potting mix for vegetables should be loose, rich in organic matter, and well-draining. You can achieve this without fancy store-bought ingredients by blending a few components:
Mix these components together in a wheelbarrow or large bucket. Aim for a loose, crumbly texture that holds moisture but doesn’t stay soggy.
Mix everything thoroughly so your natural additives are distributed. You now have a nutrient-rich, fluffy potting mix ready to support healthy growth in containers.
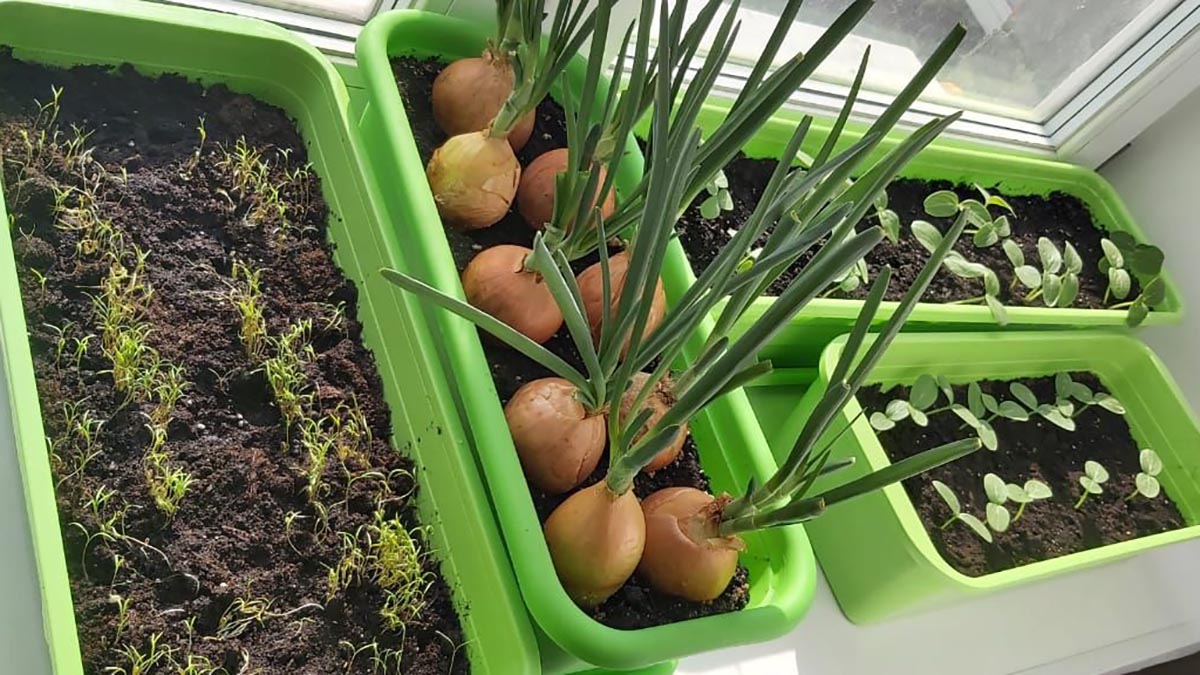
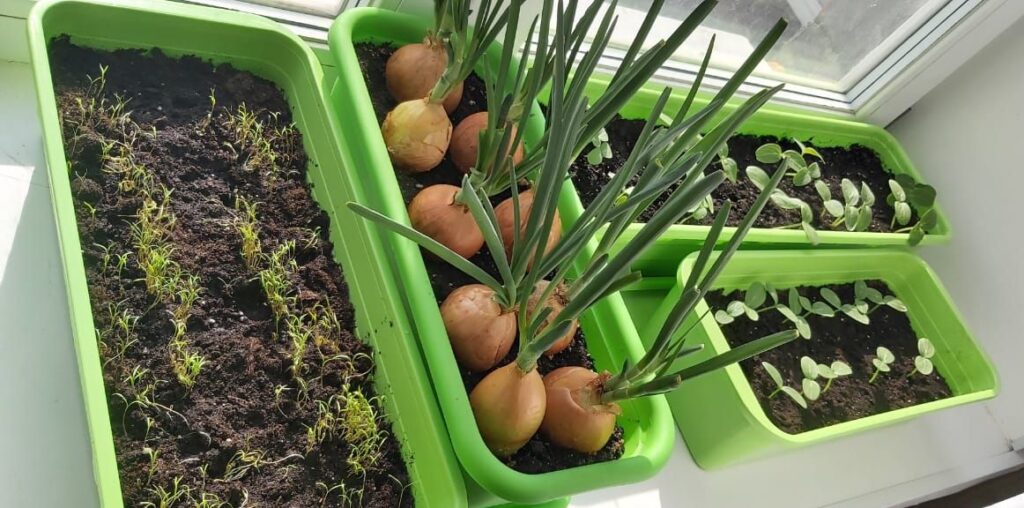
One fantastic aspect of container gardening is that you can bring it indoors. Whether you have a sunny window or invest in some LED grow lights, indoor growing allows for year-round gardening and more control over the environment.
Note: if you’re interesting in also growing non-edible indoor plants, check our Ultimate Edible Indoor Garden Guide.
Most vegetables and herbs need plenty of light to grow strong. A south-facing window might work for greens and herbs, but for fruiting or tuber crops like potatoes and for big onions, supplemental light will make a huge difference. LED grow lights are energy-efficient and can be set on a timer (generally 12-16 hours of light a day for veggies). Position lights just a few inches above young seedlings, and 6-12 inches above mature plants (depending on light strength). If using simple shop lights or clamp lights, get full-spectrum or “daylight” bulbs. Without sufficient light, indoor plants can become leggy (tall, weak, and pale).
Indoor plants typically like temperatures that are comfortable for humans (65–75°F). One advantage inside is you don’t worry about frost. However, very warm indoor heating can dry out plants, so you may need to water a bit more often or use a humidity tray (a tray of water near the plants to evaporate and raise humidity). Ensure good airflow around your plants to prevent mold or fungus – a small fan can help gently circulate air, which also strengthens plant stems.
Always use containers with drainage holes or be extremely cautious not to overwater if there are no holes. Overwatering is a common killer of houseplants. Check soil moisture with your finger: if the top inch is dry, it’s probably time to water. When you do water, water thoroughly until a bit drains out the bottom (if possible), which prevents salt buildup from fertilizers. Use a tray to catch drips. In an apartment, you might water a bit less than outside since there’s no sun and wind to dry pots quickly, but heating can dry them – so just monitor. Every environment is a little different.
For the crops we discussed (potatoes, garlic, onions, root veggies), pollination isn’t a factor because we’re not after fruits. But if you venture into, say, growing a dwarf tomato or chili pepper in your indoor setup, remember that outdoors, insects or wind would pollinate them. Indoors, you might need to hand-pollinate by gently shaking the plant or using a small brush to move pollen between flowers. Again, not an issue for leafy and root crops – they’ll produce edible parts without flowering.
Because you’re indoors, you’ll want to guard against mess and pests. Use potting mix that was pasteurized or naturally composted well so it doesn’t bring in gnats. If you notice little flies (fungus gnats), you can let the soil surface dry more between waterings and use yellow sticky traps. Keep the area tidy of fallen leaves which could mold. But don’t let these considerations scare you – plenty of people run robust indoor herb gardens or even grow tents for veggies with minimal pest issues.
Of the crops in this article, green onions, garlic greens, lettuce, spinach, and herbs are the easiest to grow entirely indoors under lights. They don’t take up much room and they tolerate the indoor environment nicely. Potatoes can be grown indoors (perhaps in a spare room or basement under a strong light), but remember the plants will get bushy and need a big pot; also, check that your indoor temps don’t get too high, as potatoes like cooler root zones. Garlic can be grown in pots indoors, but it still needs that long period to form bulbs and will want good light – you might mostly get garlic greens unless you simulate seasonal changes well. Carrots and radishes can do well under lights due to their short stature; just ensure the lights are close enough to them. In fact, an indoor carrot harvest in the middle of winter is quite a treat! The main takeaway is to manage expectations and try things out. Start with quick-win crops (leafy greens, scallions, radishes) while also tending a longer-term project (like an indoor potato bin) if you have the space, so you get some immediate rewards and some later.
We mentioned jars in materials – indoors you can also grow certain things in water alone, a practice known as hydroponics (in the simplest form). For example, keeping a jar of water with a sprouting sweet potato can create a lovely vine (and eventually small tubers or at least leaves you can eat as greens). Green onion scraps as discussed can grow in a glass on the windowsill. Even herbs like basil will grow roots in water – you can keep a cutting alive for weeks. Just note that purely water-grown plants may need a nutrient solution for long-term growth, but for short-term regrowing of scraps, plain water changed regularly works fine.
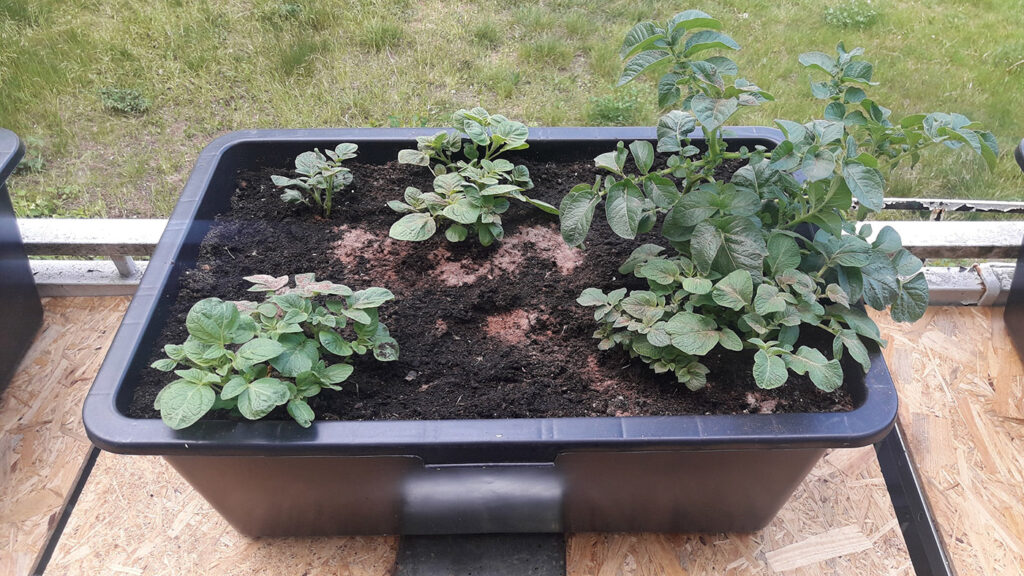
When growing outdoors in containers, you benefit from natural sunlight and generally more robust growth, but you also have weather and outdoor pests to consider. Here are some tips for outdoor container gardens:
Pay attention to how much sun each spot gets through the day. Most veggies like 6+ hours of direct sun. If you only have a partial sun area (3-5 hours), you can still do leafy greens and herbs, but root crops like carrots or bulbs like onions will prefer more sun to size up well. The nice thing about containers is you can move them if needed – start them in a sheltered spot during early spring cold weather, then move into more sun as it warms, etc. If you’re using very large containers (like heavy barrels), put them on wheels or choose the spot wisely from the start.
Nature will help sometimes with rain. But always monitor your containers because a windy hot day can dry a pot quickly. In summer, you might need to water once (or even twice) a day for small pots. Large barrels hold more moisture and might go a couple of days. Try to water in the morning so plants have water through the heat of day. If only watering in evening, avoid splashing water on leaves to reduce disease risk (damp leaves overnight can invite fungus). Grouping containers together can create a slightly more humid microclimate and make it easier to water (you can water one and let excess flow to another if arranged smartly). Using self-watering containers (with a water reservoir) is another low-tech trick – for instance, setting a small pot atop a water-filled tray or inserting a bottle of water upside-down into the soil can slowly drip irrigate.
Outdoor plants face heavy rain, hail, strong winds, or heat waves. Be prepared to protect them. If a big storm is coming, you can temporarily move containers under an eave or into a garage. Wind can topple tall plants or lightweight pots – place rocks in the bottom of light pots to add weight, and position pots against a wall or rail for support. For sun scorching days, a shade cloth draped lightly or moving pots to afternoon shade keeps them cooler. In cold snaps, you can wrap containers in burlap or blankets and cover plants with an old sheet at night. Think of containers as mobile raised beds – you have the advantage of mobility and also the challenge that they don’t have the earth’s stable temperature buffer.
Outside, you might encounter slugs, snails, caterpillars, or aphids on your container plants. Hand-picking is often easiest with a few containers. Copper tape around pots can deter slugs (they don’t like crossing it). You can also set beer traps for slugs (a small dish of beer sunk at soil level, they crawl in and drown). Aphids can be sprayed off with a hose or controlled by a gentle soap spray. Because you’re growing in a limited soil amount, avoid using harsh chemical pesticides or fertilizers – it’s not needed in a small system and can do more harm. For rodents (mice or squirrels digging up bulbs or stealing produce), consider a mesh or chicken wire barrier on top of pots (especially for newly planted seeds or potatoes – rodents love to dig up fresh compost or nibble seed potatoes). Once plants are bigger, it’s usually less of an issue. If neighborhood cats treat your containers like a litter box, definitely use some mesh or lots of twiggy sticks poking up until they get the hint or the soil fills in with plants.
In a garden bed, crop rotation (changing plant families in an area each season) helps prevent soil diseases and nutrient depletion. In containers, you should also refresh or rotate the soil to keep plants healthy. A good practice is at the end of a crop, remove any leftover roots or debris. Add some fresh compost to that container before planting something else. Try not to grow the exact same crop in the same soil year after year without amending – for example, don’t do onions in the same potting mix for 3 years straight. Mix it up: follow potatoes with some leafy greens or flowers, then maybe carrots, etc. Alternatively, empty the container and mix the soil with some new compost, then reuse (container soil can usually be recycled for a few cycles with boosting, but eventually you might dump it in a garden bed or compost pile and start with a new mix if it gets tired).
Outdoor container gardeners can take advantage of each season. In spring, plant cool-season crops like lettuce, spinach, radish, and green onions. As it warms, use those containers for summer crops (peppers, cherry tomatoes, basil, etc. if you expand beyond root veggies). For example, your potato tub or garlic pot (since they finish by midsummer) can be re-planted with a fall crop of kale or carrots that will grow into autumn. Then in late fall, maybe plant some garlic cloves or cover crop in that soil. Keep things moving – this not only maximizes your harvests but keeps pests confused and soil active.
In order to make this section easier to read, all the different plants and herbs you can grow have their own articles.
In order to make a better use of this indoor gardening guide, you can also learn about vitamins, essential minerals, electrolytes and key nutrients following our Nutrition Reference Sheets series:
One of the joys of container gardening is the possibility of year-round growing with a bit of planning. Here are some notes on timing and cycles to help you get continuous produce:
A few final practical tips to leave you with:
Growing plants in small containers is awesome, but if you also want to go soiless you can try our hydroponics guide: NFT Hydroponics for Home Gardeners: A Complete Guide.