Physical Address
304 North Cardinal St.
Dorchester Center, MA 02124
Physical Address
304 North Cardinal St.
Dorchester Center, MA 02124
You don't need a big plot of land to grow garlic and onions, as a matter of fact you don't need any land!, you can grow a surprisingly large amount of garlic and onions just using jars, pots, half-barrels and other small containers. This tutorial will guide you through the process in a friendly and easy to follow manner.
Garlic is a kitchen staple that’s surprisingly easy to grow, and it thrives in pots or buckets as long as they are deep enough. Garlic doesn’t take up much space horizontally – you can plant several cloves in one wide container – but it does need some depth for root growth (8 inches or more). Growing garlic in containers allows you to control soil and moisture, which garlic appreciates. Here’s how to grow your own garlic.
The Small Containers Gardening series
This article is part of a series of articles related to planting all kinds of edible plants and herbs in small containers. The articles in this series are:
This article is specifically about growing carrots, radishes and leafy greens in Small containers. For more information about soil composition, crop cycles, indoor and outdoor setups, and common problems and issues, go Planting in Small Containers Main Guide.
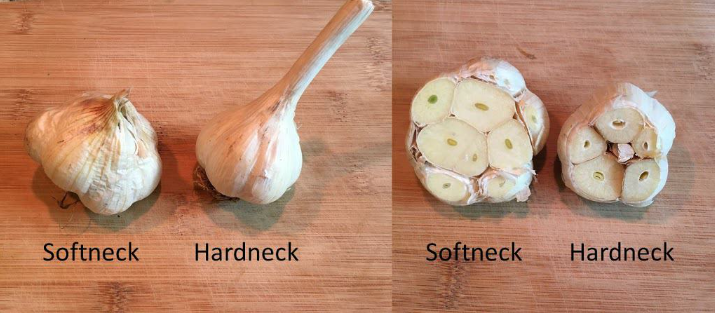
There are two main kinds of garlic:
Softnecks are easier to grow in mild climates and they store for longer after harvest. Hardnecks are more cold-hardy (great for those with chilly winters) and they produce delicious garlic scapes (edible curly flower shoots) in early summer. Decide which suits your climate and taste. If uncertain, softneck is a safe bet for beginners and indoor growing.
Garlic is grown by planting individual cloves (not from seed, unless you have special garlic bulbils which take years). Take a bulb of garlic and gently break it apart into cloves. Select the largest, healthiest cloves for planting – each clove will become one new bulb. Do not peel off the papery skin; leave it intact. If you got your garlic from a grocery store, try to use organic garlic, as non-organic might be treated with sprout inhibitors. Also, some store garlic is softneck from mild climates and might not perform well in cold regions. For best results, you could buy seed garlic or get some cloves from a local farmer who grows garlic (ensuring they’ll suit your area). But many people have had success with supermarket garlic in containers.
Choose a container that’s at least 8 inches deep (deeper is fine). A wide planter box, a deep wooden drawer, or even reusable shopping bags can work. Fill with your potting mix, leaving an inch below the rim. Plant each clove pointy end up, flat root-end down. Push the clove down about 2 inches into the soil. Space the cloves about 4 inches apart from each other – they need room to form bulbs. In a 1-foot wide pot, you might fit 3-4 cloves; in a half barrel, you could plant maybe 8-10 cloves spaced out. Cover the cloves with soil and pat gently. Water them in.
Garlic likes full sun for best growth. Place the container in a sunny spot outdoors, or under strong grow lights if indoors. Water regularly to keep the soil slightly moist, but be careful not to overwater – garlic hates sitting in water (“wet feet” will cause the cloves to rot). A good rule is to water when the top inch of soil is dry. Since containers dry out faster, check often. In rainy periods, ensure your containers drain well or move them under shelter to avoid waterlogged soil. If growing outdoors in a cold climate and you planted in fall, you can mulch over the container with straw or leaves to insulate the garlic through winter (garlic can handle freezes, but container soil can get very cold; mulching helps). Remove the mulch in spring when temps rise.
If your soil mix was rich in compost, garlic may not need much additional fertilizer. However, garlic is a fairly heavy feeder in its early growth phase (fall through spring). You can top-dress the container with a bit of compost or worm castings in spring, or use a balanced organic fertilizer according to directions. Garlic has few pests; one nice thing about growing it in a container is avoiding soil-borne diseases that sometimes hit garlic in the ground. Watch for any yellowing of leaves too early, which could indicate a nutrient issue or overwatering. In general, garlic will quietly do its thing over many months – it’s not a fussy plant if its basic needs are met.
Garlic is typically a long-season crop. If you plant cloves in fall (around October in many areas), they will slowly grow roots in the cool soil, perhaps sprout leaves before frost or just wait underground, then burst to life in spring, and finally be ready for harvest by early to mid-summer. Hardneck types especially need a period of cold (vernalization) to form big bulbs; planting in fall provides that naturally. If you missed the fall window or you live in a very mild climate, you can plant garlic in late winter/early spring, but the bulbs may turn out smaller (still usable though!). One trick: to grow hardneck garlic in warmer climates or for spring planting, simulate winter by chilling the cloves in the fridge for 8+ weeks before planting.
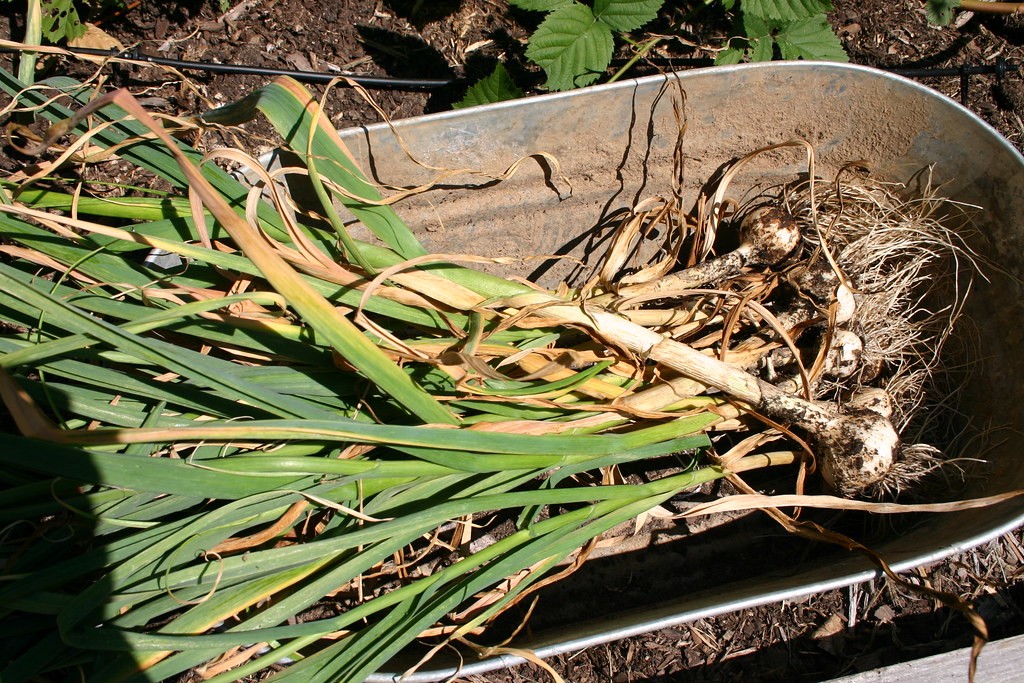
Garlic tells you it’s ready when the green leaves start to turn brown from the bottom up. Typically, when about 30-50% of the leaves have browned, it’s harvest time. For fall-planted garlic, this is often in June or July. In containers, you might notice the garlic looking a bit toppled and yellow. A week or so before harvest, stop watering – let the soil dry out a bit (this helps prevent the bulbs being too wet at harvest). To harvest, loosen the soil around each bulb (since it’s a container, you might carefully tip it or just use your hands to dig around). Pull up the garlic bulbs gently by the stem. You should see nice formed bulbs where you planted each clove. Brush off the loose soil (don’t wash them yet). Cure the garlic by bundling or laying out the plants in a dry, airy place out of direct sun for about 1-2 weeks. Once cured, the outer skins will papery and dry. Cut off the stems (for hardneck, leave an inch; for softneck, you can braid them if you want). Trim the roots, and your homegrown garlic is ready to store for months of delicious meals!
One more note – if your goal is not big garlic bulbs but rather a supply of garlicky greens (sometimes called garlic chives or garlic scallions), you can plant cloves closer together (even in a small shallow pot or jar) and just snip the green shoots as they grow. This is similar to growing green onions. Each clove will send up shoots that taste like a milder garlic. This is a quicker crop (you can snip shoots within weeks of sprouting) and can be done year-round indoors. Just keep replanting cloves for continuous greens. They won’t form full bulbs this way, but it’s a great use of a spare clove.
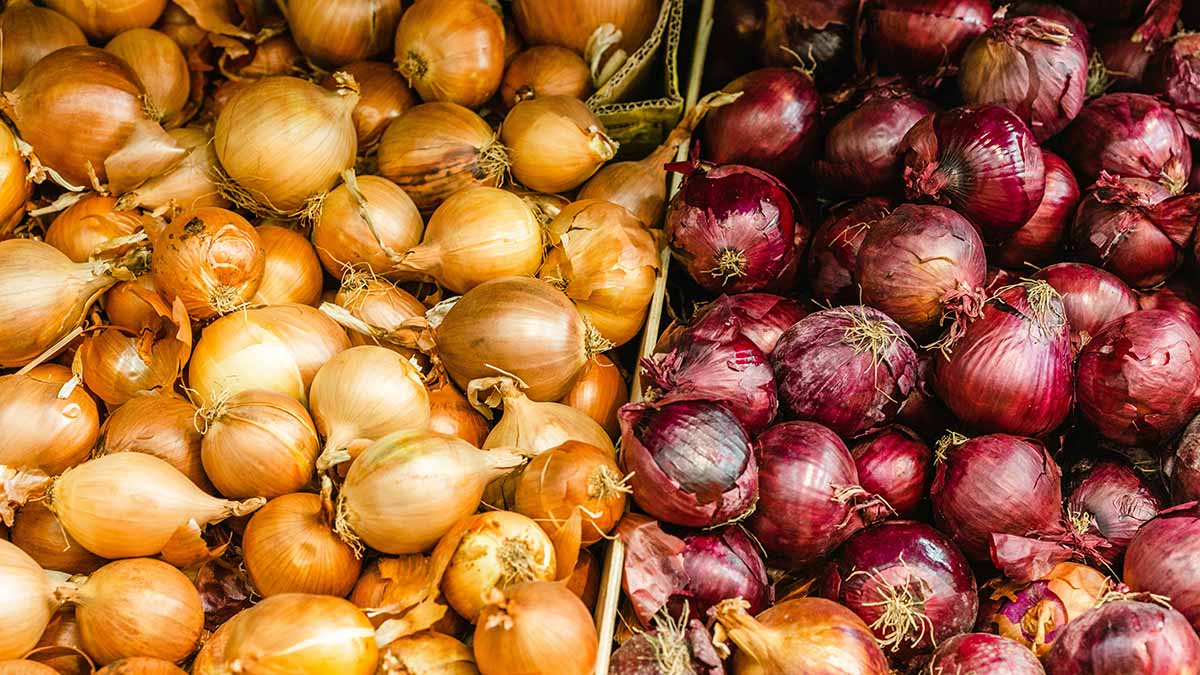
Onions are another versatile allium you can grow in containers, with a few different approaches depending on whether you want big dry bulbs or tasty green onions. Onions generally need a bit more width in a container if you’re growing multiple, but not a ton of depth (6–8 inches depth can suffice for most onions). Let’s break down the options:
You can grow onions from seeds, from seedlings, from sets, or even from kitchen discards.
Onions prefer well-draining, loose soil (much like garlic). Your container should be at least 6 inches deep (deeper doesn’t hurt). A wide container is great since you can fit multiple onions. For example, a plastic tub the size of a dishpan can grow a dozen onions, or a 5-gallon bucket can hold maybe 5-6 onion plants. Ensure plenty of drainage holes. Fill with the general potting mix we prepared. Onions appreciate a bit of extra phosphorus (for root and bulb development) – you could mix a tablespoon of bone meal into the soil when planting, or use a balanced fertilizer later.
If using sets, simply push each tiny bulb into the soil so that the pointed end is up and the top is just covered or at soil surface (some gardeners leave the very tip of the set poking out). Space them about 3-4 inches apart if you want them to grow into full-size onions. If you plant them closer (1-2 inches apart), you can harvest some early as green onions to thin them out, leaving others to bulb up with more space. If planting seedlings, make a small hole and gently firm the soil around each transplant, again spacing appropriately. For seed, sow them in clusters and thin later, or start in seed trays and transplant. Once planted, water lightly to settle the soil.
Onions need full sun (outdoors, choose a bright spot; indoors, strong grow lights or a very sunny window). They also have relatively shallow roots, so container onions might need watering more frequently. Keep the soil consistently moist but not waterlogged. A layer of light mulch (straw or dried grass clippings) on top of the soil can help retain moisture in larger containers outdoors. Watch that the mulch doesn’t smother the tiny seedlings though.
One thing to know about onions is that bulb formation is triggered by day length. There are short-day, long-day, and intermediate (day-neutral) varieties. Short-day onions start bulbing when days get to about 10-12 hours of light (these are typically planted in the fall or winter in mild climates and harvested in early summer). Long-day onions need about 14-16 hours of light (they’re planted in spring in cooler climates, harvest mid-late summer). Intermediate can adapt to about 12-14 hours. Why does this matter for containers? If you’re gardening in a very northern area, long-day onions do best; in the far south, short-day are best. If you use sets from a local store, they’re likely the right type for your region. If you grow under grow lights indoors, you could theoretically “trick” the onions by giving longer light periods, but most folks just grow based on natural seasons. For green onions, day length isn’t an issue because you’re not waiting for bulbs.
Onions appreciate some nitrogen early on to grow lots of green leaves (each leaf corresponds to a ring in the onion bulb, more leaves = bigger bulb potential). So a month after planting, you can feed with a nitrogen-rich organic fertilizer (like fish emulsion or compost tea). Once the day length triggers bulbing (you’ll see the base start to swell), you can ease off the nitrogen; at that point, a bit more potash (potassium) helps (wood ash tea or a balanced fertilizer works). However, in containers, don’t overdo it – a small dose goes a long way. Common issue: If you notice the tips of onion leaves browning, it could be underwatering or occasionally lack of nutrients. Usually it’s just part of the cycle as some older leaves die off.
As the onion bulbs expand, sometimes you’ll see the tops of the bulbs pushing up out of the soil – that’s normal. Unlike potatoes, do not cover them up; onions actually bulb above the soil a bit. Keep the soil just slightly covering the growing bulbs, but don’t mound soil on top.
Onions are ready to harvest when the majority of the green tops have fallen over and turned yellow/brown. In a container, they might all flop over around the same time. Stop watering at this stage. Pull up the onions gently on a dry day. Let them cure (dry out) in a warm, airy place out of direct sun for a week or two (similar to garlic). Once the skins are papery, trim the roots and cut the stems down to 1-2 inches (or braid the stems of softneck-type onions). Store in a cool, dry place. One tip: If you grew them pretty densely in the container, you might have some smaller bulbs – these can be used up first in the kitchen or you can even replant small bulbs in the fall as sets for next year.
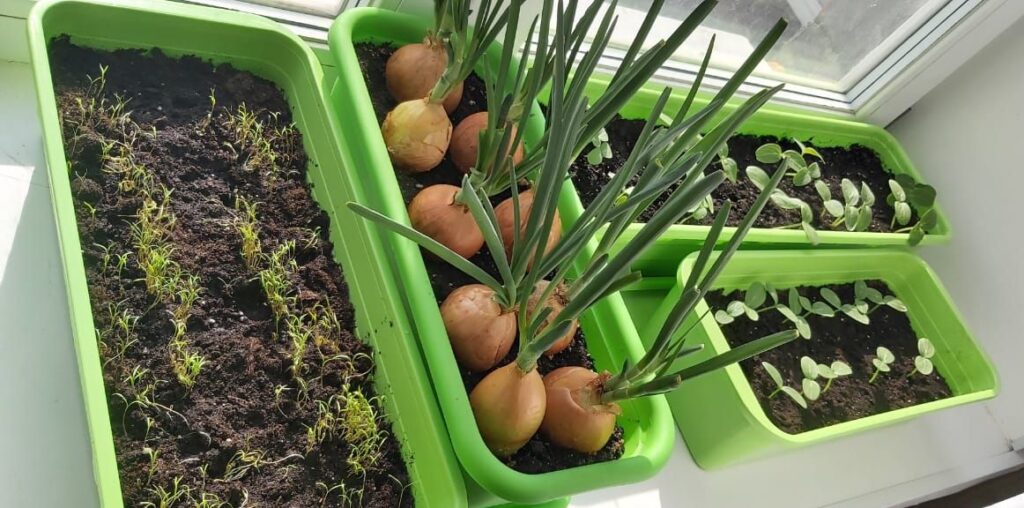
If you have indoor grow lights, you can start onion seeds in late winter and have transplants ready by spring. For a continuous supply of scallions, keep replanting the rooted bases after you harvest the greens. In warm climates, you can plant short-day onions in the fall in containers and overwinter them outdoors or in a cool greenhouse, then harvest in spring. Onions are biennial, meaning if you keep an onion growing into a second year (or through a warm winter), it will send up a flower stalk. If you see a thick stalk forming from the center, that onion is “bolting” (going to flower). Once that happens, the bulb stops growing and won’t store well. You can still use the onion soon, or even let it flower and collect seeds, but generally we harvest before bolting. Growing in containers can sometimes stress onions (heat or crowding) and cause bolting, so that’s another reason to keep them well-watered and not plant too early in fluctuating spring weather.
Garlic Cycles: Plant in fall for next summer harvest – that’s the classic cycle for temperate climates. If you want garlic greens, you can plant cloves indoors anytime for year-round scallions. If you missed planting in fall, you can still plant cloves in early spring and get a harvest in late summer, just possibly smaller bulbs. After harvesting garlic, you can reuse that container for a quick crop of greens or something since it’ll be mid-summer (plenty of time for a short crop or even planting some herbs).
Onion Cycles: For bulb onions, decide if you’re doing spring planting (for long-day types) or fall planting (short-day types). Green onions can be continuously sown or replanted. For example, you could grow a batch of bunching onions in spring, harvest through early summer, then use the same pot to grow a small fall lettuce crop, etc. Bunching onions (perennial bunching varieties) can also be left in a pot and they’ll resprout year after year as long as you divide them occasionally and refresh soil.
You can keep reading about growing different types of plants in the Small Containers Planting Main Guide.