Physical Address
304 North Cardinal St.
Dorchester Center, MA 02124
Physical Address
304 North Cardinal St.
Dorchester Center, MA 02124

Permanently and securely wiping your hard drive is an easy task, these are the four easiest and most useful tools using algorithms certified by the DoD.
The only sure way to completely make disappear the contents of a hard drive is to physically destroy it. That’s why so many companies make sure their sensible data will not fall into the wrong hands by having technicians drill holes into their discarded hard disks and then throwing them inside metal shredders.
However, that’s expensive and you also may want to resell that hard disk so destruction is not an option. If that’s the case we’re happy to inform you that there are several ways to completely and permanently erase your hard drives in a secure and permanent way. (Note: technically it’s not that expensive if you just open your hard disk and destroy the platters with a hammer)
In this article we will list many of these methods, including some of the leading tools used to forensically wipe your hard drives permanently.
But before we talk about these tools we need to talk about how computers “erase” the information inside your hard drives.
It may come to the surprise of many, but when you delete a file inside your hard disk the file and its contents, ergo de 0s and 1s that represent the information contained in said file, will remain inside your hard disk until the sectors previously occupied by the file are rewritten with a new combination of 0s and 1s. This rewriting isn’t instantaneous or even quick, Windows, Linux, OS X, or any other operating system you may use, will rewrite these sectors only when it’s really needed; like for example filling your hard drive with new contents. This occurs mainly because when you hit delete your operating system assumes these sectors where the file is located are “not important anymore”, so it doesn’t need to preserve that information anymore and will overwrite it only when new files will require that space. All the operating system does is just deleting the records pointing to that file in the file system’s index leaving the actual information forgotten in the sectors.
Because of the behavior of the erasing mechanism we’ve previously mentioned the following problem arises: the content of erased files can be recovered pretty easily and quick using forensic tools that ignore what the file system’s index says and will scan all the sectors in the hard drive reconstructing the information as it sees it. With a bit of luck (or bad luck if you don’t want the information in these files to be recovered) the forensic tool will start recovering erased files in a matter of minutes, and within a few hours, depending on the size of the hard drive, a long list of deleted files and directories will be ready to be accessed again and read.
Secure drive erasers are very useful, albeit a bit relatively slow. They work by constantly filling the offending hard drive with random information, again and again since multiple passes are required. Each pass or round changes the way the data is written into your hard drive. For example, the first pass may fill your hard drive’s binary information with a seemingly endless series of 1s, the second pass will do the same but with a seemingly endless series of 0s and further passes may start filling your had drive with random patterns of 0s and 1s.
Multiple passes are necessary because of an unforeseen problem: bad sectors. Your hard disk may have sectors gone bad where data writing was not possible during a pass due to the damage in that sector, further passes may be able to successfully rewrite it (this is why we said during the beginning of this article that the only sure way is the total physical destruction of the disk)
DBAN (Darik’s Boot and Nuke) is one of the oldest and most popular disk secure erasure tools, and one of its major advantages is that it’s an operating system agnostic tool since you have to directly boot your computer with it. DBAN is free and open source, and it was originally developed by Darik Horn but now it’s now owned by Blancco, a data tools company from Finland.
All the algorithms used by DBAN to erase disks are considered among some of the best in the industry, many certified by the Department of Defense itself.
You can download DBAN from here.
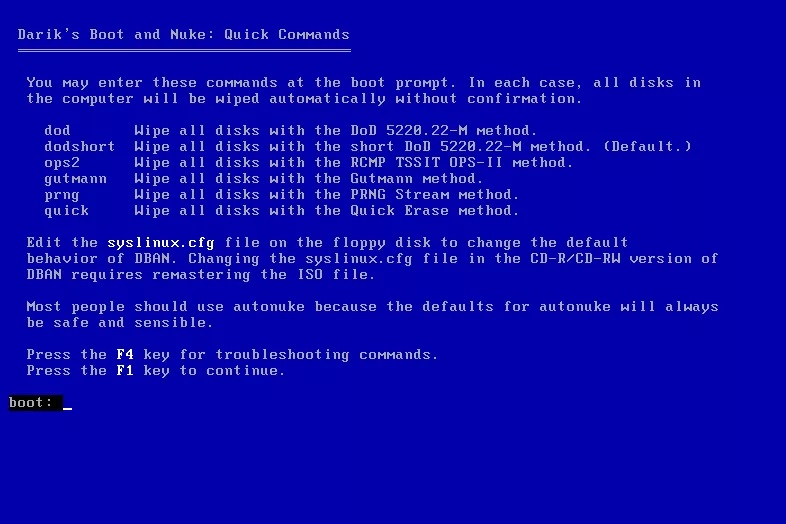
How to use DBAN to wipe ALL your hard drives
You can wipe all hard disk drives in your system using the quick commands mode.

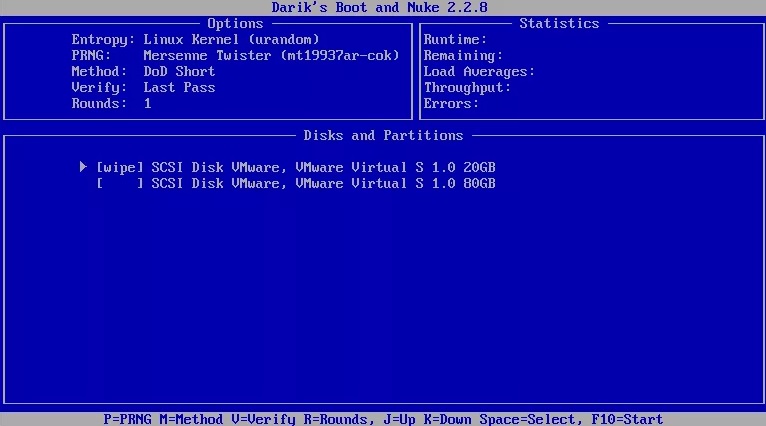
How to use DBAN to wipe a specific hard drive
If you want to wipe a specific hard drive you’ll need to use the interactive mode.

Linux users can use an enhanced version of DBAN’s dwipe suit called Disknukem. Disknukem adds a few new features. You can download it in its Github page.
This is perhaps one of the easiest and simplest options, since it requires using CCLeaner, the popular junk file cleaner from Piriform. CCleaner comes with an integrated disk wiper. It can be found on its side menu under the Tools section. Once inside it go to the Drive Wiper tool, choose the Wie method, the Security level (the amount of passes) and lastly the drive to wipe and hti the “wipe” button.
You can download the CCleaner free version from here.

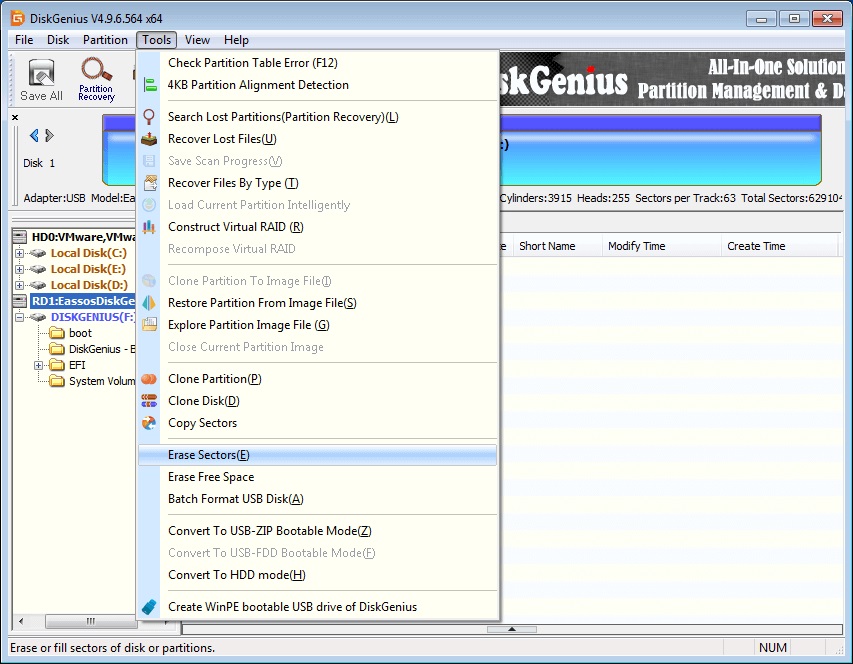
DiskGenius is another disk wiping software that uses multiple data filling passes as its wiping method. It also includes a partition manager which will allow you to resize, format and clone disk partitions.
You can download DiskGenius from here.
Wiping a secondary or external hard disk with DiskGenius

Wiping you main/system disk with DiskGenius
DiskGenius can also wipe your main disk, as is the case with DBAN you’ll have to boot into a special ISO in order to do it.
SSDs have an option called secure erase which should be used to securely delete files. It’s extremely recommended that you DO NOT use any of the methods above mentioned on an SSD. This is due to the way multiple successive writes wear down SSDs (this doesn’t happen with Hard Disks).